Using Ambient Occlusion for depth can transform your 3D visuals in Blender, offering richness and realism to objects by simulating how light radiates in real life. This technique shades areas differently based on how exposed they are to ambient lighting, thereby adding depth and enhancing the overall visual fidelity of a scene. By manipulating occlusion settings, artists can achieve a more convincing depiction of spatial relationships within their models.
Add depth with Ambient Occlusion in Blender simply and effectively. A few clicks can distinguish between flat visuals and those with tangible volume and detail. Blender’s user-friendly interface makes it accessible even for beginners.
Some may find integrating AO into their workflow intimidating, but with a clear understanding of its basics, the process becomes straightforward. The difficulty often lies in balancing subtlety with impact. With this in mind, let’s delve into Understanding the Basics of Ambient Occlusion in Blender, equipping you with the knowledge to overcome this challenge and enhance your 3D creations.
Understanding the Basics of Ambient Occlusion in Blender
To truly understand the impact of ambient occlusion in Blender, think of it as a way to add realism to your scenes. Ambient occlusion, or AO for short, simulates how light behaves in the real world, particularly how it creates soft shadows in corners and crevices where objects meet. The inclusion of AO in your renders can often be the difference between a flat, lifeless image and one that pops with depth and detail.
Mastering the AO basics in Blender isn’t as daunting as it may seem. You can start by locating the feature in the World settings of the Properties panel, where you’ll find controls for strength and distance. Tweaking these values allows you to control how pronounced the AO effect appears, helping to subtly accentuate the geometry of your model.
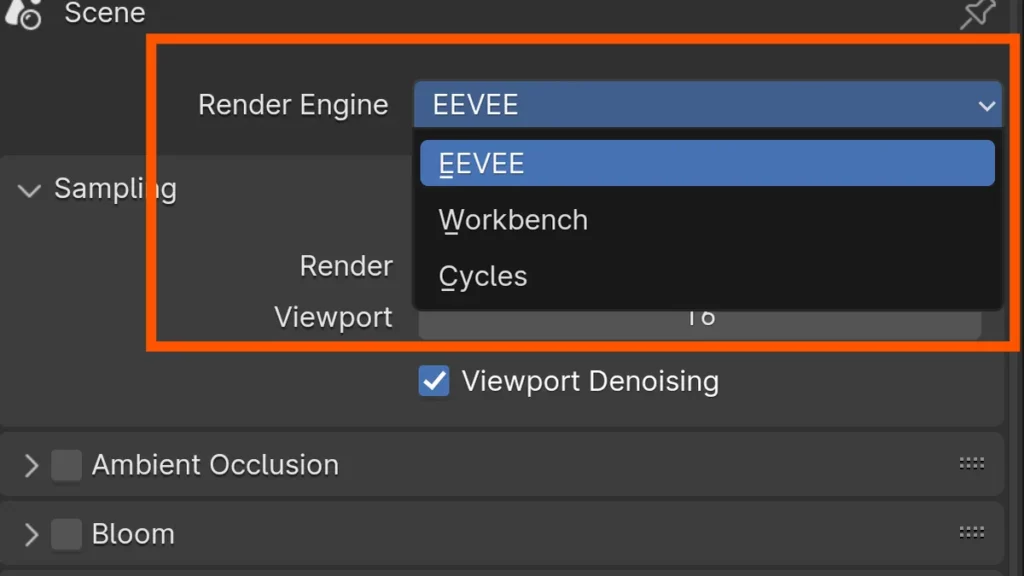
Applying ambient occlusion in Blender is straightforward. To toggle AO, press F3 and search for “Ambient Occlusion” or navigate to the Render Properties tab and check the Ambient Occlusion box. With AO activated, Blender will calculate the occlusion in real-time, giving you instant visual feedback as you adjust settings to achieve the desired level of depth.
Remember, while AO adds depth, it’s crucial not to overdo it. Subtlety is key when aiming for a natural look. As you experiment with the Ambient Occlusion basics in Blender, you’ll develop a feel for just the right amount of shadowing. Next, we’ll explore how to fine-tune these settings for different lighting scenarios, ensuring your models look their best in any environment.
Quick Setup Guide for AO in Your Scenes
- Open Blender and navigate to the “World” tab in the Properties panel.
- Check the “Ambient Occlusion” box under the “World” section.
- Adjust the “Distance” and “Factor” sliders to control the strength and reach of the ambient occlusion effect.
- To preview the changes, switch to the “Rendered” view mode.
- Experiment with different settings to achieve the desired depth and realism in your scenes.
- Don’t forget to render your scene to see the final result with ambient occlusion applied.
Techniques to Enhance Depth Perception with Ambient Occlusion
Ambient Occlusion (AO) is a crucial technique for adding realism to your 3D scenes in Blender. It works by simulating how light radiates in real life and how objects block that light, creating soft shadows in crevices and where objects meet. By using AO, you can enhance the depth of your scene, making it appear more three-dimensional and grounded.
To start enhancing the depth of your models with AO, navigate to the World Properties tab. Here, you’ll find the Ambient Occlusion settings. Simply enable it and you will instantly notice the depth enhancement techniques at work as shadows appear where objects are close to each other. Adjust the settings to control the intensity and spread of the occlusion effect to best suit your scene.
Blender also offers the ability to bake AO into your textures, which can be incredibly useful for game assets or other real-time applications. Access this feature by going to the Render Properties tab and then to the Bake section. Choose ‘Ambient Occlusion’ from the bake types, and then hit Bake. This will calculate the AO and save it into a texture, which you can then apply to your models.
Remember that AO is not a replacement for proper lighting. Instead, it complements your light setup by adding subtle details that enhance the depth perception and overall realism of your scene. With the depth enhancement techniques provided by AO, even the simplest of models can gain a new dimension of realism. Now that you’re equipped with these techniques, you’re ready to explore how to combine AO with other Blender features to further bring your scenes to life.
The Significant Benefits of Using AO
One of the key benefits of AO in Blender is its ability to add depth to scenes. It simulates how light behaves in the real world. This enhances the realism of digital environments. It does this by emphasizing the contact shadows. These shadows occur where objects or features meet. They ground these objects or features more convincingly in 3D space.
Another advantage of using AO is the boost it adds to your renders’ visual quality. This technique adds depth. Flat shading can’t do this. It makes your renders look more lifelike and appealing. Ambient Occlusion produces subtle shadows. But, they have a big impact on the scene’s appearance.
Adding AO to your Blender workflow is easy. It can greatly speed up rendering. Go to the World settings and enable Ambient Occlusion. This lets artists add realistic shading without long render times. This makes Ambient Occlusion cost-effective. It adds quality to your projects without complex lighting setups.
Using AO helps the look of your projects. It also speeds up your work in Blender. With just a few simple steps, you can enhance the mood and weight of your scenes, making your 3D models pop. This valuable tool is essential for artists looking to elevate their work to the next level. We continue to explore what Blender can do. Let’s delve into how to use Ambient Occlusion well in your projects.
Adjusting Real-time AO Settings for Instant Feedback
When working in Blender, adding ambient occlusion to your scenes can greatly enhance the depth and realism of your renders. Ambient occlusion is a shading technique that calculates how exposed each point in a scene is to ambient lighting. This creates more realistic shadows and helps to define the shapes of objects better.
Step-by-Step Guide to Adjust AO in Blender
Step 1: Open Blender Project
- Launch Blender and open your project where you want to adjust the ambient occlusion.
S2: Access the Properties Panel
- Navigate to the “World” tab located in the Properties panel on the right-hand side of the Blender interface.
S3: Enable Ambient Occlusion
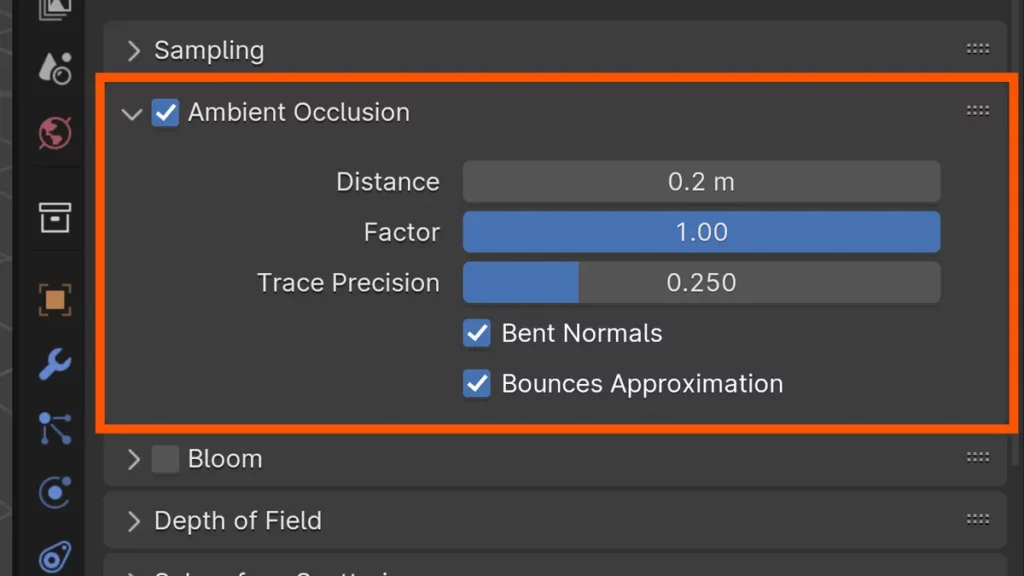
- In the “World” tab, scroll down until you find the “Ambient Occlusion” section.
- Check the “Ambient Occlusion” checkbox to enable the feature.
S4: Adjust the Factor
- Locate the “Factor” slider within the AO settings.
- Move the slider to increase or decrease the strength of the ambient occlusion effect. Increasing the value will intensify the shadows, making them darker.
S5: Set the Distance
- Find the “Distance” slider under the same section.
- Adjust this slider to control the reach of the ambient occlusion effect. Increasing the distance will allow the shadows to spread further, making them appear softer.
By making these adjustments in real-time, you can instantly see how ambient occlusion affects the lighting and shadows in your scene. This allows you to fine-tune the settings to achieve the perfect balance of depth and realism in your renders.
Tips for Fine-tuning AO Effects in Blender
| Tip Number | Description |
|---|---|
| 1 | Adjust the distance: Control the distance at which ambient occlusion appears to modify the effect from subtle to pronounced. |
| 2 | Experiment with the strength: Manage the intensity of the effect. Lower for softer looks, higher for dramatic impact. |
| 3 | Utilize the radius setting: Adjust the size of occlusion shadows. Smaller values for sharper shadows, larger for diffused ones. |
| 4 | Combine with other lighting techniques: Use ambient occlusion with other lighting methods to enhance scene dynamics. |
| 5 | Use multiple samples: Increase the number of samples to improve quality and reduce noise, but watch for increased render times. |
BEGIN LEARNING AND DEVELOPING WITH OUR BLENDER VIDEO SCHOOL!!
Check out our course library if you are looking for a systematic and effective way to improve your skills as a 3D artist. Click Here To Learn Blender The Right Way!